
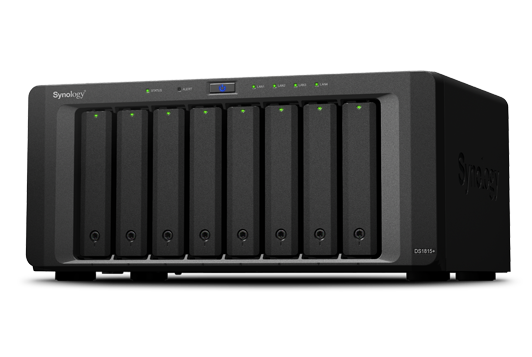
When you are setting up a Synology NAS, such as the 8 bay ( DS1815+ ) system I got, you’ll want to start with your smallest drive first and add larger ones over time. If you start with your biggest drive, you won’t be able to make use of the smaller ones.
The reason is best explained in the Synology knowledgebase titled What is a Synology Hybrid RAID (SHR) and there’s two images that particularly explained it to me :
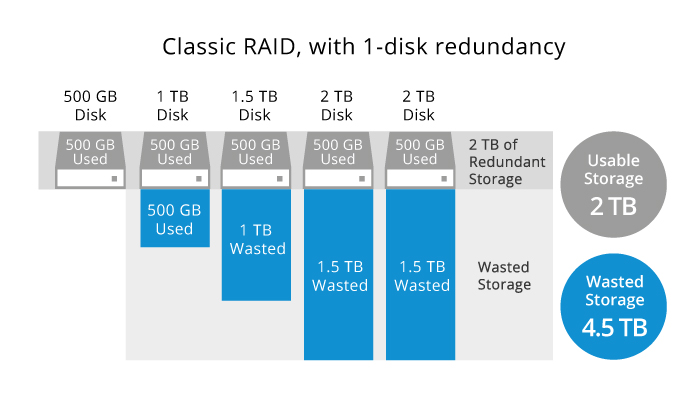
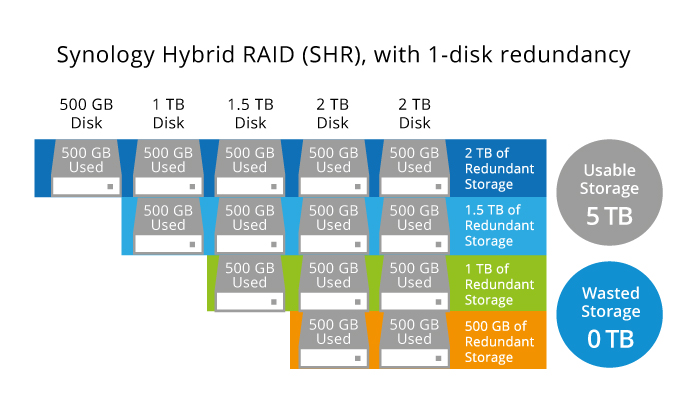
The first explains how a classic RAID setup wouldn’t make use of the different sized drives whilst the Synology Hybrid RAID (SHR) would. The thing that isn’t explained until right near the end of the article is that you can’t add smaller drives. Their explanation (with some highlighting from me) is :
Does an already-created SHR volume accept drives of smaller capacity?
Suppose your SHR volume is built on 1TB drives. To replace the old drives or add new ones, you will have to use drives equal or greater than 1TB. A smaller drive (e.g., 500GB) cannot be added to the existing SHR (or Classic RAID) volume. Even if this smaller drive is added, the storage of the smaller drive still cannot be used within the volume.
Conclusion
If you are a company setting up a Synology, buy a bunch of identical drives (same size and brand), preferably the NAS rated ones like the WD Red. You’ll be fine, just know that you can’t use smaller sized drives than what you’ve put in.
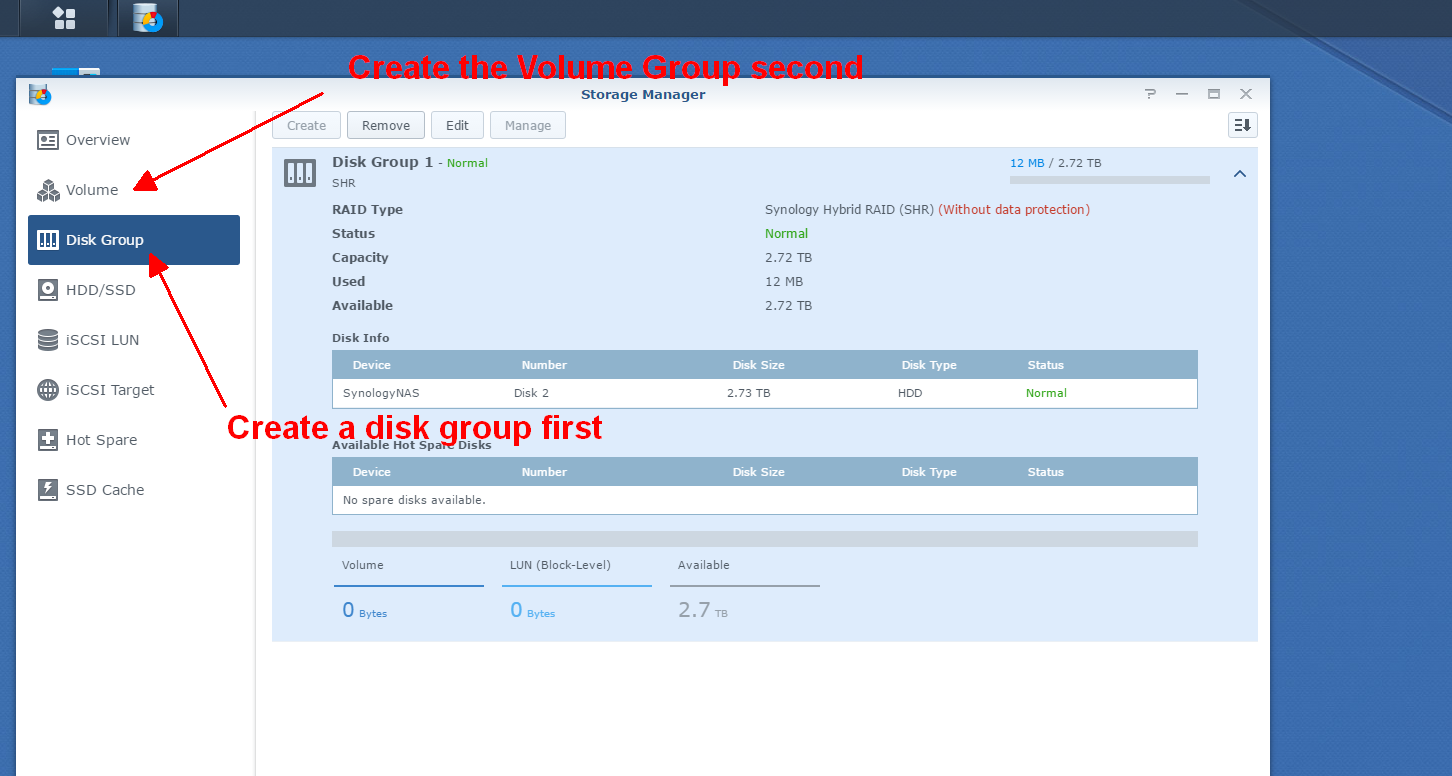
If you have a collection of different sized drives, put your smallest sized one in first and create a disk group then volume group based off that.
Backstory
You don’t need to read this, it’s my personal story, not the main learning, but it’s here so you get a better understanding of my circumstances and if they apply to you.
Many years ago I got a Drobo 5n, a nice little 5 bay NAS. To me it’s the Mac version of a NAS, it tries to do everything for you, but when it breaks there’s little you can do, it also seems to focus on form over function when compared to the Synology. It looks nicer, but doesn’t do anywhere near as many things.
Still, I was a budding photographer, occasional film maker and nerd who accumulated terabytes of TV shows and Movies over the years. I used the Drobo as my master datasource for my photography collection. Years of events, portrait photos, wedding photos, videos of local activism events like the 2 week long Walk for Solar or a Climate Change conference I had helped organise. Basically, stuff with great significance that I didn’t want to lose.
I started off using the Drobo with some 500GB and 1TB drives and slowly purchased larger sized drives as I needed, I remember having a full set of 2TB drives, adding a couple of 3TB drives, a couple of 4TB drives and then a 6TB drive. As mentioned, this was over the course of many years and included moving and eventually something gave way. The top bay of the Drobo stopped working. It just didn’t recognise any drives inserted in it. Not new ones, not old ones, not after being cleaned up. This put a stop to me being able to increase the size of the Drobo as the way you increase the size is to pull out a hard drive and put a new, larger one in. But with the default settings it can only deal with a single drive not working and then rebuild the data striping to the newer drive. As it stands the Drobo will lose data if any more drives fail, which they’ll eventually do.
The great thing about slowly replacing the old drives was that I ended up with a large box full of various sized hard drives that I could backup the important photos and videos onto and store as an off-site backup, just in case.
Choosing a Synology was easy, I became jealous of them when a work college at NextFaze got one and showed off it’s features. I later suggested that Svelte Studios (now a part of Jamshop) get one and got to play with it when I was working there. We used it for not just as a file store for designers to edit off, but hosted websites off, I setup a cronjob to Rsync files from our servers as a backup, used it for time machine and all sorts. It’s effectively a Linux box but built for storage and is much easier for non sys-admin people to use.
Due to a variety of reasons such as moving out and working on a startup company it took me a good 10 months to finally afford to buy the Synology seeing as I’d put it in the Important but not urgent financial category. I also managed to purchase a WD RED 6TB drive to go with it. I figured I could start with that, empty a couple of smaller drives of data onto it and put the drives in.
This is where the problems started. I didn’t know about the need to put the smaller drives in first so I moved the contents of a 3TB drive onto the Synology which only had the 6TB drive in it (so no data integrity backup), popped the 3TB into the Drobo and… Nothing. It wasn’t initialising. It showed the drive there, but it wouldn’t let me expand it. I created a disk group as none existed before, only had the volume for the 6TB drive. I waited for the disk to be initialised with a full bad sector scan, but I couldn’t add the disk group to the volume, only create a new volume based on that disk group.
I’m now in the process of emptying a 1TB drive and want to use that as the starting size for the Disk Group, add the 3TB drive in and create a volume group from it using SHR and Btrfs, then migrate the data off the 6TB volume which I’d used the quick setup wizard to create, then add the 6TB drive to the disk group and expand the volume before adding a bunch of other drives and data. The aim is to do all of this without actually losing any data. Fingers crossed a drive doesn’t die in the middle of an important operation.
I should also mention that in my investigations I came across a post about how to speed up your Synology volume expansion. It requires you to SSH into the machine and do some stuff on the command line. Something I do daily, but might be a bit too much for others. It’ll also slow down your NAS whilst it’s doing it. It’s also probably not needed as Synology have made some adjustments since 2014 when that blog post was written.
Note : I do not in any way work for Drobo nor Synology. This is not a paid post.
I stumbled across this blog entry just a few hours too late after creating 5x3TB raid while waiting for another bunch of 1TB drives to add in later… sucks to be me lel
Thank you, just the information I needed. Nice writing, too.
@Adri, simply rebuild the array with smaller disks, with an external USB backup. I did this and it took 3 days.
Thanks for this. The reading was sensational.
By the by, setting up an SHR-2 with tiny- to 4TB disks right now, very fun. With a new storage pool, so it accepts tiny disks with backed up data.
Regards,
Exsosus
Linux admin- and systems support specialist